I think everyone can pretty much agree that contouring is here and here to stay. In the past two years there seems to have been a massive rise in popularity with the trend with celebrities and makeup guru's sharing their tips, some have become quite creative with it and I'm sure you've seen the clown or tiger inspired contoured looks going around; but how realistic are these looks to recreate? I personally am I lover of minimal contouring and going all out as if I were one of the original club kids rocking it in the 80's but what products will keep us looking contoured to the high heavens and how can we achieve these looks on a budget? I spoke to some of my fellow make-up students to find out their fix-up favorites that are within reach and still get that desired chiseled look we all want...
Sleek contouring pallete - £9
This pallet has great review and many of my friends use this, they've updated their range so there are more colours to choose from for your skin tone (finally!) but it's way within budget and works like a charm!
Bourjois delice de poudre bronzing and highlighting powder - £8
So.... these are newish from Bourjois as they've now got a highlight option and they've also brought out a darker shimmery bronzing powder as I don't think the other colours dark enough for deeper skintones.
Travel size Strobe Cream - £10
Strobing is such a trend right now and Mac's hero product 'Strobe Cream' has been a hit ever since Kylie Minogue had this glowy stuff rubbed on her butt in her video spinning around! You can buy the larger version but if you're working on a budget you can also buy the travel sized one for half the price which means you get the high end product without the high price!
Anastasia Beverley Hills Contour pallete - £38 or £45 for cream contour
This has been raved about for quite some time now and the powder version is cheaper, it depends what sort of look you want to go for; if you prefer a more natural look (although you can build these products) go for the powder and if you want to experiment and go all out grab the cream. These are a little more expensive however you do get all you need in these pallets so it depends on how much you have to spend.
NYX Wonderstick Highlight and Contour Stick - £9
This is a really cost effective contour tool, the texture is super thin however but in some ways I think this may be better as it is more easily blend-able and doesn't look to 'cakey'. However I do suggest, if you want more coverage under the eye to get a concealer with a heavier coverage as I said this is quite light in coverage!
LA Girl Pro Concealer, Highlight and Contour - £5 each
I've heard such good things about this concealer, super good coverage with colour correcting options if you suffer from redness or dark spots/circles. I've watched a few tutorials and reviews on these products and it looks like a good one to try as if you bought a set of two for concealing and correcting it wouln't break the bank!
NYX Cosmetics Conceal, Correct Contour Palette - £19-£20
I always prefer to use powders for contouring and highlighting so this product would be perfect for me, it has good reviews I think it depends what shades you want to use as this palette has both cool and warm shades with most of them being matte with only a few with shimmer. For the day though you should always stick to matte shades for contour as shimmery products will reflect light and matte ones will help to add that shadow you want.
To contour and highlight wit creams and powders:
Once you've got your desired products and tools to hand you'll need to make sure all the hair is off the face to ensure you have a nice and easy canvas to work on.
Prime your face with the desired primer and your first step is to correct in any areas that need colour correcting for example any red areas or any dark circles or dark spots. You can do this for example with one of the correcting concealers shown above by NYX.
Once everything is colour corrected take your foundation and apply evenly all over.
Once you've got your base you'll need your cream concealer or cream contour palette to hand (you don't always have to do this step as this is for a more extreme contoured look but it's always handy to know!) take your lighter concealer shade that you wish to use, this will most likely be one to two shades lighter than your natural foundation shade to add a lifted look under the eye and towards the cheekbone. Once this is on, buff in with a damp beauty blender, making sure not to drag the product on the skin but to pat to ensure an even coverage. Obviously the under eye isn't the only area that needs highlighting so use this product down the centre of the nose if you want to, the centre of the forehead and chin if necessary.
Now you'll start to see some sort of shape forming on the face, and this is where the contouring comes in. So contouring basically should be used in the areas that naturally fall under shadow in natural light (in the real world people!) so this is where the product needs to be added to look legit. The hollows of your cheekbone are a good place to start so place a small amount of your cream contour just where you can feel the hollow of your cheekbone; not too high or too low so make sure you're using a brush on the smaller side to ensure precise application (obviously a beauty blender works perfectly also). So now we've chiseled our cheekbones it's onto the forehead where needed so take a look at the shape of your face......where would you like there to be more shadow or depth? Mine for example is the corners of my forehead as I want them to appear a little further back, so I lightly sweep my cream contour onto these areas and buff it in leaving that lovely highlight we applied to the centre of the forehead free of contour. You can also contour the nose and chin if you feel you want to but for the nose make sure again you are using a nice fluffy brush that's a little smaller to make sure you draw a precise line evenly down the sides of the nose before you buff it in.
Now were onto the next stage....
Grab a translucent powder and lightly powder the areas we have contoured to set. I try and stay away from the highlighted areas so I don't make them look to muddy, some people like to 'bake' and this looks really good in pictures but to make sure we keep everything looking clean.
Using the powder contour use an angled or fluffy brush and go over your contour to darken and intensify (you can use a cool toned contour colour or warm depending on how warm you want your look). Next you can use a blusher and blend this into your contour to add some colour to the apple of the cheeks. Finally choose your highlight colour to sweep across the top of the cheekbone using a small fluffy brush as this picks up the product easier. This will add a shine to the cheekbone but keep the shimmer to a minimum depending on the time of day. You can set this with a translucent powder or light coverage powder to finish and spritz with a fix plus spray or finishing spray.
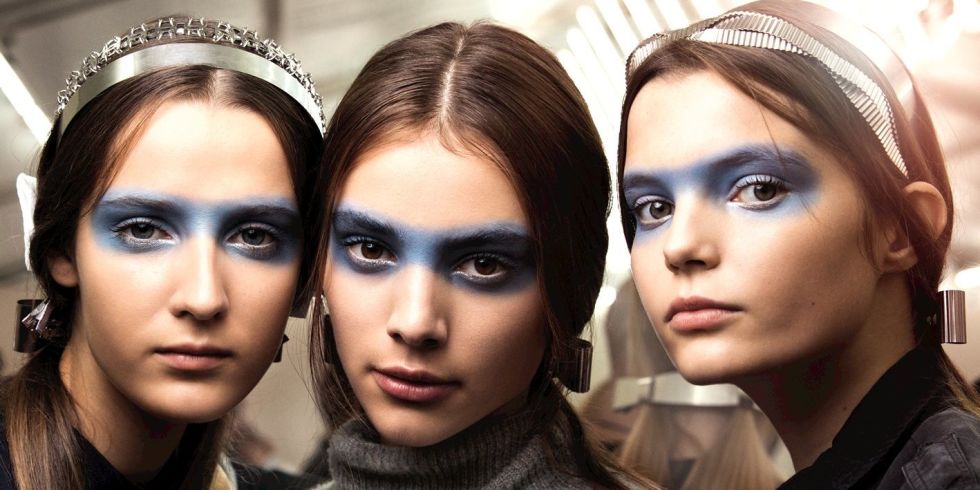
As you can see the first three images are quite subtle contoured looks, but I've done a more intense version below on myself so it's really all just down to your taste and budget but either way these products are going to make those cheek bones pop girls!

 You can see in both of these images the fabrics silk and lace are repetitively utilised with the focus in the top image on the face with the hair pulled back with what looks like golden halos on the model's heads. The second image is taken from a different perspective, the angle of the models is almost heavenly with them looking down at us the viewer with an angel-like quality.


